Copyright Michael Karbo and ELI Aps., Denmark, Europe.
Chapter 41. Check your adapters
I have now described adapters and their bus connections in a number of more theoretical sections.
Lets look at the subject a little more practically. I will use my own PC as an example, to show which adapters are installed and what I can learn from them.
Look in the cabinet
If you are going to follow my examination using your own PC, start by looking in the cabinet and seeing what adapters (plug-in cards) are actually installed. I have three cards installed:
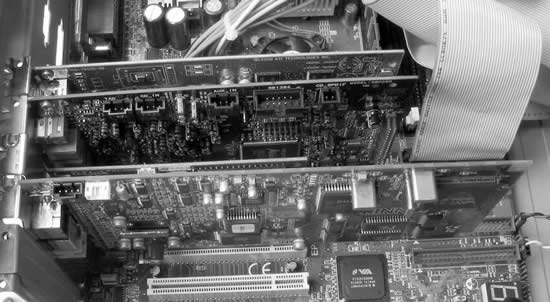
The three cards are:
I can see this from the back of the cabinet. There I can see the cards back plates and connectors, and they look like this:
A closer look at a sound card
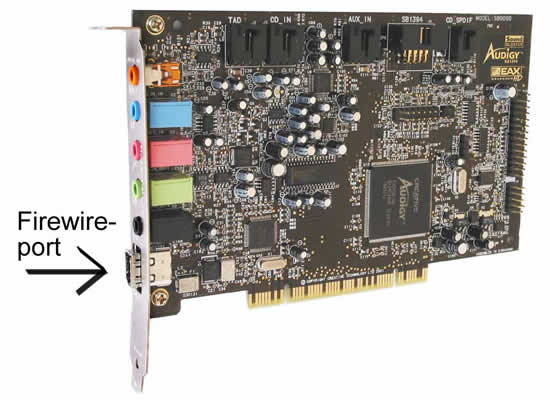
I will now take a closer look at one of my adapters. I have chosen the middle card, which is a sound card, a Sound Blaster Audigy. It is a bit unusual in that it has a built-in FireWire port. That is, the card has several functions; it operates as a sound card with many facilities. And it also functions as an IEEE-1394 (FireWire) host controller. This is what the card physically looks like:
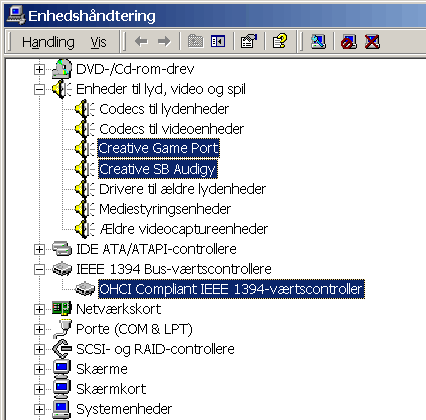
Since the card has several functions, it appears in several places in the list of system devices. I can find it under sound devices, where there are two devices (Creative Gameport and Creative SB Audigy) which are components of this adapter. And further down I can see the FireWire controller (IEEE 1394):
If I double-click on the device Creative SB Audigy, I see the following information displayed:
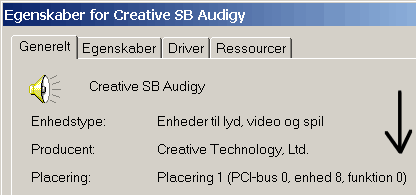
I can read that the actual sound functions are located on PCI bus 0 (there can be several PCI buses on the same motherboard). The adapter is installed as device 8. The sound component is function number 0.
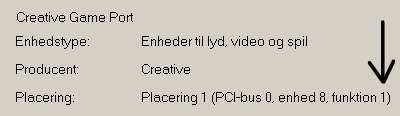
If I double-click on the device Creative Gameport, I can see that the game port is function number 1 on this card.
Finally, I will look at the FireWire controller. It has function number 2 on device 8 (which is the SB card):

Figure 190. The FireWire controller is the last function on this sound card.
Check your own cards
In the section above I have shown how you can use the Windows Device Manager to investigate the PCs I/O system. You can do this in all versions of Windows. However, Windows 98 doesnt provide the Location information (as at the bottom of Fig. 190. Both Windows 2000 and XP provide this.
In all versions of Windows, you can open System Properties by using the shortcut key, Windows+Pause, and then clicking your way in to the Device manager.
Examine your PCs I/O devices yourself now as follows:
1. First find out what adapters you have in your PC. Note which sockets (slots) the cards are installed in, and check the connectors on the back plate so that you are sure of their function.
2. Note the information displayed on the screen when you start the PC (as in Fig. 175, on page 68). You can stop the screen scrolling using the P key to give you time to note the information.
3. Then open the Windows Device Manager and find the devices corresponding to your plug-in cards.
4. See what IRQs they use, and note where they are located on the PCI bus, if you can find this.
5. Compare your observations on IRQ allocation with the messages you see on the screen during PC startup. Are these consistent? Is it the same adapters and IRQs you can see in both places?
6. Then use the Device Manager to find an overview of the IRQ allocation. Compare this with Fig. 179. Which IRQs are shared? Which internal system devices can you see in your list?
7. Which DMA channels are being used in your PC? Compare this with Fig. 181.
8. Finally, investigate your hard disk and USB controllers. What can you find out about them?
If you spend some time doing this exercise I guarantee you will gain a better grasp of this part of the PC architecture!