Chapter 5. Installing Slackware Linux
- Table of Contents
- 5.1. Booting the installation CD-ROM
- 5.2. Partitioning a hard disk
- 5.3. Installing Slackware Linux
5.1. Booting the installation CD-ROM
The easiest method for booting the installation system is by using the installation CD-ROM. The Slackware Linux installation CD-ROM is a bootable CD, which means that the BIOS can boot the CD, just like it can boot, for example, a floppy disk. Most modern systems have a BIOS which supports CD-ROM booting.
If the CD is booted when you have the CD inserted in the CD-ROM drive during the system boot, the boot sequence is probably not correctly configured in the BIOS. Enter the BIOS setup (usually by this can be done by holding the <Del> or <Esc> key when the BIOS screen appears) and make sure the CD-ROM is on the top of the list in the boot sequence. If you are using a SCSI CD-ROM you may have to set the boot sequence in the SCSI BIOS instead of the system BIOS. Consult the SCSI card manual for more information.
When the CD-ROM is booted, a pre-boot screen will appear. Normally you can just press <ENTER> to proceed loading the default (bare.i) Linux kernel. If want to install Slackware Linux to a disk that is attached to a SCSI or SATA controller, you have to boot an alternative kernel. You can boot an alternative kernel by entering the kernel name on the prompt, and pressing <ENTER>. The following table lists some of the alternative kernels, for a full list of kernels, refer to the Slackware-HOWTO file on the CD-ROM.
Table 5-1. Alternative kernels
| Kernel | Description |
|---|---|
| adaptec.s | This kernel provides support for most Adaptec SCSI controllers, including VLB and EISA models aside from the more modern PCI controllers. |
| bareacpi.i | This kernel is similar to the bare.i kernel, but provides support for the Advanced Configuration and Power Interface (ACPI). |
| ataraid.i | This kernel provides support for some commonly used ATA RAID controllers. |
| sata.i | This kernel is similar to the bare.i kernel, but provides support for commonly used SATA controllers. |
| scsi.s/scsi2.s/scsi3.s | These kernels provide support for various SCSI controllers. Refer to the Slackware-HOWTO on the CD-ROM for a list of controllers supported by each kernel. |
After booting the installation system, you will be asked whether you are using a special (national) keyboard layout or not. If you have a normal US/International keyboard, which are the most common, you can just press <Enter> at this question. After that the login prompt will appear. Log on as "root", no password will be requested. After logging on the shell is started, and you can start installing Slackware Linux. The installation procedure will be explained briefly in this chapter.
5.2. Partitioning a hard disk
Installing Slackware Linux requires at least one Linux partition, creating a swap partition is also recommended. To be able to create a partition there has to be free unpartitioned space on the disk. There are some programs that can resize partitions. For example, FIPS can resize FAT partitions. Commercial programs like Partition Magic can also resize other partition types.
After booting the Slackware Linux CD-ROM and logging on, there are two partitioning programs at your disposal: fdisk and cfdisk. cfdisk is the easiest of both, because it is controlled by a menu interface. This section describes the cfdisk program.
To partition the first harddisk you can simply execute cfdisk. If you want to partition another disk or a SCSI disk you have to specify which disk you want to partition (cfdisk /dev/device). An ATA hard disks have the following device naming: /dev/hdn, "n" is replaced by a character. E.g. the "primary master" is named /dev/hda, the "secondary slave" is named /dev/hdd. SCSI disks are named in the following way: /dev/sdn, "n" is replaced by the device character (the first SCSI disk = a, the fourth SCSI disk = d).

After starting cfdisk currently existing partitions are shown, as well as the amount of free space. The list of partitions can be navigated with the "up" and "down" arrow keys. At the bottom of the screen some commands are displayed, which can be browsed with the "left" and "right" arrow keys. A command can be executed with the <Enter> key.
You can create a Linux partition by selecting "Free Space" and executing the "New" command. cfdisk will ask you whether you want to create a primary or logical partition. The number of primary partitions is limited to four. Linux can be installed on both primary and logical partitions. If you want to install other operating systems besides Slackware Linux that require primary partitions, it is a good idea to install Slackware Linux onto a logical partition. The type of the new partition is automatically set to "Linux Native", so it is not necessary to set the partition type.
The creation of a swap partition involves the same steps as a normal Linux partition, but the type of the partition has to be changed to "Linux Swap" after the partition is created. The suggested size of the swap partition depends on your own needs. The swap partition is used to store programs if the main (RAM) memory is full. If you have a harddisk of a reasonable size, it is a good idea to make a 256MB or 512MB swap partition, which should be enough for normal usage. After creating the partition the partition type can be changed to "Linux Swap", by selecting the "Type" command. The cfdisk program will ask for the type number, "Linux Swap" partitions have type number 82. Normally number 82 is already selected, so you can go ahead by pressing the <Enter> key.
If you are satisfied with the partitioning you can save the changes by executing the "Write" command. This operation has to be confirmed by entering yes. After saving the changes you can quite cfdisk with the Quit command. It is a good idea to reboot the computer before starting the installation, to make sure that the partitioning changes are active. Press <ctrl> + <alt> + <del> to shut Linux down and restart the computer.
5.3. Installing Slackware Linux
The Slackware Linux installer is started by executing setup in the installation disk shell. Setup will show a menu with several choices, you can see a screenshot of the installer in Figure 5-2. Every option has to be completed to do a complete Slackware Linux installation, but once you start the setup guide will guide you through the options.

The first part of the installation is named "ADDSWAP". The setup tool will look for a partition with the "Linux Swap" type, and ask you if you want to format and activate the swap partition (see figure Figure 5-3). Normally you can just answer "Yes".

After setting the swap up space the "TARGET" menu is launched, which you can see in Figure 5-4. It is used to initialize the Slackware Linux partitions. Setup will display all partitions with the "Linux native" type.

After selecting one partition, the setup tool will ask whether you want to format a partition or not, and if you want to format it, whether you want to check the disk for bad sectors or not (Figure 5-5). Checking the disk can take a lot of time.

After selecting whether you want to filesystem or not, you can specify which filesystem should be used (Figure 5-6). Normally you can choose the ext2, ext3 and reiserfs filesystems. Ext2 was the standard Linux filesystem for many years, the disadvantage is that Ext2 does not support journaling. A journal is a special file or area of a partition in which all filesystem operations are logged. When the system crashes the filesystem can be repaired rapidly, because the kernel can use the log to see what disk operations were performed. Ext3 is the same filesystem as Ext2, but adds journaling. Reiserfs is a newer filesystem, that also provides journaling. Besides that Reiserfs uses balanced trees, which make many filesystem operations, especially when you are working with many small files, faster than with Ext2 or Ext3. A disadvantage is that Reiserfs is newer, that is why it can be a bit more unstable.

The first initialized partition is automatically mounted as the root (/) partition. For other partitions the mount point can be selected after the initialization. You could, for example make separate partitions for /, /var, /tmp, /home and /usr. This provides extra protection against crashes. For example the, / partition is barely changed after the installation if you create these partitions. So, on the occasion of a crash, the chance that the / partition was in the middle of a write operation is much smaller.
The next step is to select the source medium (Figure 5-7). This dialog offers several choices, like installing Slackware Linux from a CD-ROM or installing Slackware Linux via NFS. Most of the times Slackware Linux is installed from CD-ROM, so this is what we are going to look at. After selecting "CD-ROM" you will be asked whether you want to let setup look for the CD-ROM itself ("Auto") or you want to select the CD-ROM device yourself ("Manual"). If you select "Manual" the setup tool will show a list of devices. Select the device holding the Slackware Linux CD-ROM.

After choosing an installation source the setup tool will ask you which disk sets (series) you want to install packages from (Figure 5-8). A short description of each disk set is listed.

Now it is almost time to start the real installation. The next screen asks how you would like to install. The most obvious choices are "full", "menu" or "expert". Selecting "full" will install all packages in the selected disk sets. This is the easiest way of installing Slackware Linux. The disadvantage of this choice is that it can take quite much disk space. The "menu" option will ask you for each disk set which packages you want to install. The "expert" option is almost equal to the "menu" option, but allows you to deselect some very important packages from the "a" disk set.
After the completion of the installation the setup tool will allow you to configure some parts of the system. The first dialog will ask you where you would like to install the kernel from (see Figure 5-9). Normally it is a good idea to install the kernel from the Slackware Linux CD-ROM, this will select the kernel you installed Slackware Linux with. You can confirm this, or select another kernel.

At this point you can choose to make a bootdisk (Figure 5-10). It is a good idea to make a bootdisk, you can use it to boot Slackware Linux if the LILO configuration is botched.

The following dialog can be used to make a link, /dev/modem, that points to your modem device. (Figure 5-11). If you do not have a modem you can select no modem.

The next step is to select whether you would like to use hotplug (Figure 5-12). Hotplug is used for automatically configuring pluggable USB, PCMCIA and PCI devices. Generally speaking it is a good idea to enable hotplugging, but some systems may have problems with the probing of the hotplug scripts.

The following steps are important, the next dialogs will assist you with installing LILO, the Linux bootloader. Unless you have experience in configuring LILO it is a good idea to choose to use the simple option for configuration of LILO, which tries to configure LILO automatically (Figure 5-13).

After selecting the simple option the LILO configuration utility will asks you whether you would like to use a framebuffer or not (Figure 5-14). Using a framebuffer will allow you to use the console in several resolutions, with other dimensions than the usual 80x25 characters. Some people who use the console extensively prefer to use a framebuffer, which allows them to keep more text on the screen. If you do not want a framebuffer console, or if you are not sure, you can choose standard here.

After setting the framebuffer you can pass extra parameters to the kernel (Figure 5-15). This is normally not necessary, if you do not want to pass extra parameters you can just press the <Enter> key.

The last step of the LILO configuration is selecting where LILO should be installed (Figure 5-16). MBR is the master boot record, the main boot record of PCs. Use this option if you want use Slackware Linux as only OS, or if you want to use LILO the boot other operating systems. The Root option will install LILO in the boot record of the Slackware Linux / partition. Use this option if you use another bootloader.

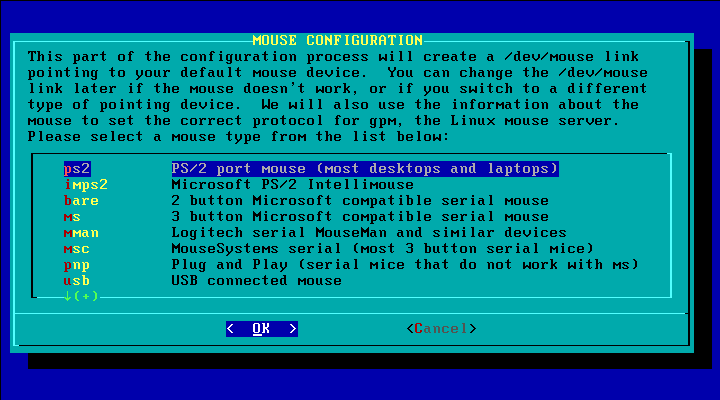
You will now be asked to configure your mouse. Select the mouse type from the dialog that appears (Figure 5-17).
You will then be asked whether the gpm program should be loaded at boot time or not (Figure 5-18). gpm is a daemon that allows you to cut and paste text on the console.

The next few steps will configure network connectivity. This is required on almost every networked system. The Slackware Linux setup will ask you if you want to set up network connectivity (Figure 5-19). If you answer "No" you can skip the next few network-related steps.

You will now be asked to set the hostname (Figure 5-20). Please note that this is not the fully qualified domain name (FQDN), just the part that represents the host (normally the characters before the first dot in a FQDN).

After setting the host name you can set the domain name part of the fully qualified domain name (FQDN) (Figure 5-21).

The rest of the network configuration depends on how the IP address is set on the network the machine is connected to. Some networks have a DHCP server that automatically assigns an IP address to hosts in the network. If this is the case for the network the machine select DHCP during this step of the installation (Figure 5-22). When DHCP is selected you will only be asked whether a host name should be sent to the server, normally you can leave this blank. If you use DHCP you can skip the rest of the network configuration described below.
If the network does not have a DHCP server you can choose the static IP option, which will allow you to set the IP address and related settings manually.

The first step of the manual configuration is to set the IP address of the first interface (eth0) of the machine (Figure 5-23).

After setting the IP address you will be asked to enter the netmask. The netmask is usually dependent on the IP address class (Figure 5-24).

You will then be asked to set the address of the gateway (Figure 5-25). The gateway is the machine on the network that provides access to other networks by routing IP packets. If your network has no network you can just hit the <ENTER> key.

The next dialog will ask you whether you want to use a nameserver or not (Figure 5-26). A nameserver is a server that can provide the IP address for a hostname. For example, if you surf to www.slackbasics.org, the nameserver will "convert" the www.slackbasics.org name to the corresponding IP address.

If you chose to use a nameserver, you will be given the opportunity to set the IP address of the nameserver (Figure 5-27).

The final network settings screen provides an overview of the settings, giving you the opportunity to correct settings that have errors (Figure 5-28).

After the network configuration you can set which services should be started (Figure 5-29). You can mark/unmark services with the <SPACE> key.

Traditionally the system clock is set to the UTC timezone on UNIX(-like) systems. If this is the case, select Yes during the next step (Figure 5-30). If you also use a non-UNIX(-like) OS on the same system, like Windows, it is usually a good idea to choose No, because some PC operating systems do not work with a separate system clock and software clock.

You will then be given the opportunity to select the time zone (Figure 5-31). This is especially important on systems that have their system clock set to UTC, without selecting the correct timezone the software clock will not match the local time.

If you installed the X Window System you can now set the default window manager (Figure 5-32). The most basic functionality of a window manager is to provide basic window managing functionality like title bars. But some options, like KDE provide a complete desktop environment.

The final step is to set the root password (Figure 5-33). The setup will ask you whether you would like to set it or not. There is no reason not to do this, and without a root password your system is dangerously insecure.

At this point you have completed the Slackware Linux installation. You can now reboot the system to start your fresh new Slackware Linux system. It was not that hard, was is? ;-)
